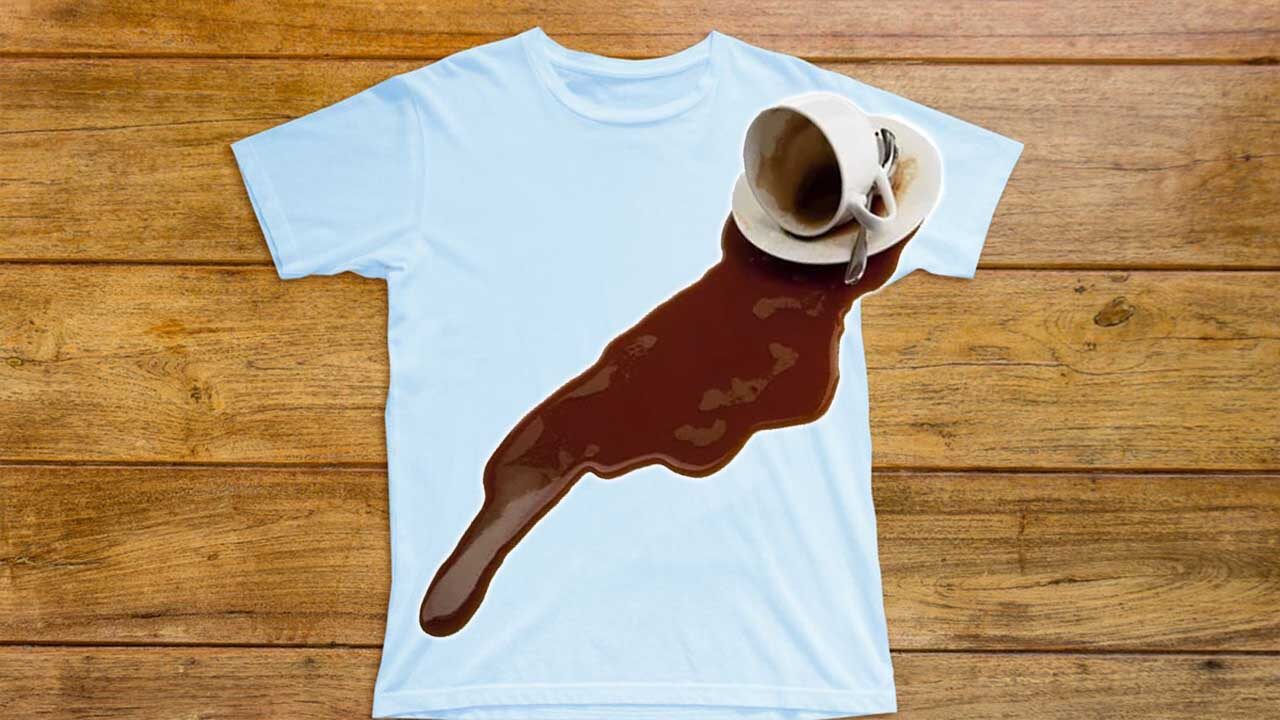
Here, are the best ways to clean stain rags, Wash wood stain rags ideas, and Many ideas for removing different types of stains from clothes and rags.
How to Wash Wood Stain Rags
This is also a simple process. Pour the liquid stain onto the wood and rub it across the grain with a dry cloth.
It is very important to dispose of the rag properly, as oil-based stains are very flammable and the rags can easily catch fire if left unattended and not treated properly.
Step 1: Collect your stained rags and take them away from the home or workshop where you were using them. Don’t clump them and squeeze them together, just take them away.
Step 2: Lay the rags on the edge of a metal hanger or metal trash can. Be careful not to stack them on top of each other, but in a single layer.
Depending on the number of rags you have, you may need multiple hangers or trash cans.
Step 3: Let the rags cure, or dry, until they are hard and dry. The time it takes depends on how soaked they are with stains, as well as the weather outside.
Step 4: Once completely hardened and dry, place the rags in the garbage bag. Place the bag in the trash can for collection. Know about, loads of laundry per week.
How to Clean Wash Rags
It’s easy, reusing cleaning rags (especially those made from organic materials, such as cotton) over time is more environmentally friendly than single-use paper towels.
If you’re motivated to reduce paper and non-recyclable plastic waste, switching to reusable cleaning rags is an easy decision.
Usually wash cotton cleaning cloths in a regular, hot laundry cycle with detergent.
Then once or twice a month (or every 2-4 times after washing), I bleach my cotton clothes to get them clean properly.
As Clorox points out, the active ingredient in oxygen bleach is hydrogen peroxide. Hydrogen peroxide is an effective but much weaker bleach than sodium hypochlorite, the active ingredient in conventional chlorine bleach.
Examples of oxygen bleach are OxiClean or Clorox 2 – both are commonly used to remove stains from colored clothing.
Because of this, chlorine bleach is your best bet if your goal is to clean. Of course, you need to be careful not to bleach more delicate fabrics like silk, mohair, or synthetic fabrics. Know about, laundry symbols.
If you are concerned about the health risks or environmental risks associated with using chlorine bleach, it goes into the science behind bleach, why it is used so much today, and how to use it properly with caution.
When it comes to bleach, my opinion is in the “all things in moderation” camp. I’ll use chlorine bleach to sanitize if needed!
Cotton Cleansing Rag Washing Instructions: Check the care label of your cleanser – white cotton fabrics should be fine to bleach.
Load your cleaning rags into your washing machine. Mix detergent and bleach in the appropriate dispenser.
Wash on the hottest cycle setting. When it comes to drying your cleaning rags, just put them in the sun.
The sun is known to be one of the toughest killers of germs. If that’s not an option where you live, your dryer will do just fine. Read about, laundry quotes.
Have you heard of the term “sick laundry cycle”? The researchers coined it to explain how “washing clothes with high levels of bacteria in the wash with other fabrics would simply result in an endless cycle of germs.”
Coming into contact with food crumbs, sticky spills and other miscellaneous residues, cleaning rags can quickly become a breeding ground for bacteria.
Now, you wouldn’t want all of this to get transferred onto your clothes or the towels that you use to dry your face and body, would you?
If you want to wash your cleaning rags with other laundry items, I suggest you pre-treat them in boiling water by following these steps:
Fill a large pot with water and let it come to a boil.
Put your cleaning rags in the boiling water.
Soak the cleaning rags for 15 minutes. The boiling water will “kill any mildew, mildew, bacteria and germs on the fabric.”
After boiling, you can wash and dry normally—yes, that means with other fabrics that aren’t considered laundry.
Laundry expert Patrick Richardson, owner of Minneapolis-based boutique Mona Williams, says that bicarbonate works by pulling oil out of the material and into itself.
If you cannot wash something—such as a significant coat or a chunk of furniture—Richardson recommends using saleratus because the first line of defense before treating the stain. This way:
Wipe off any excess oil with a towel or cloth.
Sprinkle bicarbonate on the affected cloth and let it sit for twenty-four hours.
After each day has passed, vacuum up or dismiss the sodium hydrogen carbonate.
Spray the affected area with an answer of vinegar and water.
Scrub with soap and brush, then wash.
Repeat the method if the stain remains. Know about, Non-alkaline detergent.
How to Remove Oil Stain From Clothes
Most greases and oils are semi-solid or solid at temperature, which suggests that hot or predicament is required for removal.
It also depends on the fabric: Goodman says that synthetic fibers like polyester are especially difficult to treat because grease and oils are interested in them.
And since synthetic fibers are getting more and more popular, you’ll end up battling these annoying stains more often.
And yet, removing oil stains from clothing is in no way impossible if you are doing it at the correct time. Ideally, as soon as the stain occurs.
Once it dries or sets, it’ll be much harder to induce that annoying discoloration out.
According to laundry experts, if you’re hoping to induce an oily stain out of your clothes—whether fresh or set-in—here’s everything you wish to understand.
Set-in oil stains are intimidating—and, of course, they require some work (and the correct ingredients) to get rid of.
If you do not have an opportunity to get rid of your oil or grease stains immediately after this happens, follow these steps:
Work on the stain while the material is dry. Also read about, best washing machine cleaner 2022.
It’s never a decent idea to scrub your clothes with water before engaging the stain. “It’s much easier to figure on a dry cloth because the oil and water don’t mix,” she says.
“So once you wet the material, what happens is that the water takes up all the material around the oil so you don’t should transfer the oil away.”
Place a chunk of cardboard behind the stain.
Placing a bit of cardboard between the layers of your garment will facilitate your avoid transferring any oils to other parts of the material.
Upcycle something around the house, like an old cereal carton or delivery box.
Wipe the stain with a clean, dry cloth.
You want to do to get rid of the maximum amount of surplus oil possible. Blot carefully to avoid spreading the oil to the unaffected parts of the material.
If you do not have a cloth, a handkerchief, tissue, or towel will work.
Apply dish soap to the stain.
Liquid dish soap is simply as effective at cutting grease on clothing as it does on your utensils.
As a pre-treatment, apply some drops of liquid dish soap to the stain and permit it to soak up by rubbing it gently along with your fingers, a clean, soft-bristled toothbrush, or a cloth. Let the dish soap soak certain about five minutes.
Wash off with warm water, then wash as was common. Know about, mild soap.
Wait five minutes after applying dish soap, then withdraw with warm water. Wash the item in warm water together with your usual detergent and bleach (for white items) or a color-safe laundry booster.
Air- or line-dry your items.
Since grease stains are hard to determine on wet clothing, Goodman recommends looking ahead to the machine to dry until you’re sure the finish is really spot on.
If a stain remains after air-drying, repeat the dish soap treatment and wash again in warm water. don’t machine dry your item because the heat can set the stain, making it even tougher to get rid of.
You can still remove oil stains after washing and drying clothes, it’ll just require one extra step. The warmth involved in an exceeding dryer cycle essentially “bakes” the oil into the material, which might end in discoloration.
So you’ll have to pre-treat it again, but now with an enzyme-based cleaner and your usual pre-treatment.
How to Use Baking Soda to Remove Oil Stains
Laundry expert Patrick Richardson, owner of Minneapolis-based boutique Mona Williams, says that bicarbonate works by pulling oil out of the material and into itself.
If you cannot wash something—such as a significant coat or a chunk of furniture—Richardson recommends using saleratus because the first line of defense before treating the stain. This way:
Wipe off any excess oil with a towel or cloth.
Sprinkle bicarbonate on the affected cloth and let it sit for twenty-four hours.
After each day has passed, vacuum up or dismiss the sodium hydrogen carbonate.
Spray the affected area with an answer of vinegar and water.
Scrub with soap and brush, then wash.
Repeat the method if the stain remains.
How to Use Chalk to Remove Oil Stains
Technically, chalk should remove oil from your clothes the same way baking soda does: literally by pulling the oil out of the fabric and into itself.
But he doesn’t recommend chalk for larger or set-in stains. Instead, try this trick on small splatters of grease, like if you’re cooking and you’ve got a dot of grease on your shirt.
Wipe off excess food and grease from the cloth with a clean paper towel.
Cover the entire space with chalk, allowing the oil to be completely absorbed.
Wash the soiled item as soon as possible after the stain.
How to Remove Ink Stain From Clothes
Ballpoint ink is the easiest type of ink to remove from clothing. Follow these instructions to keep your clothes looking new again.
Place a paper towel under the stain and sponge it with rubbing alcohol.
Use an eyedropper to apply alcohol directly to the stain or, for a larger spot, pour alcohol into a small pot, submerge the stained area, and let soak for 15 minutes. Get information about, In-Unit laundry.
The ink should begin to dissolve almost immediately. Continue sponging and blotting the stain until no more ink is removed from the fabric.
Rinse under cool water, apply a pre-wash stain remover like Shout Advanced Gel, and wash the fabric in warm water with fabric-safe bleach.
Check that the ink is completely gone before putting the item in the dryer.
Removing felt-tip ink takes a little longer—but isn’t impossible, as long as you follow this guide.
Wash the stain under cool water to get as much of the ink out as possible.
Fill a basin with warm water and add a bleach-free, liquid laundry detergent like GH Seal Star Tide.
A few splashes of ammonia should be applied in the same amount as the amount you would use to hand wash a blouse.
Shake the solution and immerse the garment. Scrub the stain with your fingers, and allow it to soak in for 30 minutes to an hour.
If it’s a stubborn stain, let it soak overnight, rubbing it infrequently.
Soon you will see that it is starting to fade. To help with this, mix up a fresh solution or add a little more ammonia.
When the stain is gone, wash the fabric, rub in a little more liquid laundry detergent, and wash as usual.
Like any stain, air-dry the fabric until you are sure the stain has been completely removed. Know about, What kills C. diff in the laundry?
If your pen cap has fallen into your purse, don’t worry. Dip a cotton swab in rubbing alcohol and rub the stain lightly to wipe off the stain.
If your purse has a shiny patina or shiny surface, it’s probably coated and will be easy to treat. Use a commercial product specifically designed for this purpose, such as Women’s Leather Cleaner and Conditioner.
If that doesn’t work, take your item to a dry cleaner that specializes in leather treatments.
However, many of today’s sprays contain less alcohol, so they are not as effective on ink stains as older formulas were. If you really want to deal with ink, stick with the above options.
How to Remove Rust Stain From Clothes
With some effective stain removal tips and the help of Ariel, you can become laundry savvy enough that even the toughest stains are rarely left.
Read our step-by-step guide on how to remove rust stains from clothing, or watch our instruction video below, and get rid of those pesky iron stains.
Remove excess: To start, remove excess rust with a toothbrush or other soft-bristled brush. Know about, How long does a load of laundry takes?
Thin the rust: Dilute the rust stain by rinsing it with running cold water. The higher the water pressure, the easier it will be to remove any excess stains.
Soaking: In a plastic bucket, make a soaking solution with 3 tablespoons of baking soda and cold water and allow the garment to soak for 30 minutes.
Washing preparation: Gently wipe off excess water before adding it to your wash with similar items.
Also read about, on-site laundry.
Dosage: Add detergent according to the directions on your pack. , If you have a semi-automatic washing machine, choose ordinary washing powder.
Washing: Load your garment in the washing machine along with other similar items and wash on its normal cycle at the highest temperature shown on the care label.
Unload: After the wash cycle is complete, take off the clothing immediately. Get information about, How to remove clothing sensor tags?
Rust Stain Removal With Vinegar and DetergentIf you have a seriously bad rust stain on hand, consider using this alternative rust stain removal technique:
Lay the cloth on a flat surface. Pour a small amount of white vinegar (one of Nature’s top rust stain removers) onto the stain and spread it evenly.
Let it sit for a few minutes: Wipe the area clean with a clean white towel. Keep the cloth in the sun until it dries and the stain is gone.
Wash as usual with the detergent of your choice. Also read about, best powder laundry detergent 2022.
How to Remove Blood Stain From Clothes
Here is the best idea to remove blood stains from clothes.
Brush the stained area: To remove superficial deposits of blood, brush the stain thoroughly with a toothbrush, or with your fingernail, to remove excess. For dried blood stains, you can skip this step.
Apply detergent to fresh blood stains: Treat the stain or soak the fabric in cool water with an enzyme-based detergent. Make sure the detergent is bleach-free.
Apply Hydrogen Peroxide to Dried Blood Stains: For dried blood stains on light-colored clothing, apply some hydrogen peroxide to the stain. Know about, Where to get quarters for laundry?
Be aware that hydrogen peroxide can bleach the color from clothing, so use it exclusively for light or white fabrics.
Apply baking soda: Make a paste by mixing baking soda with water and applying it to the stain. Let it sink in for half an hour. It is safe for dark-colored clothes.
Wash and press: Wash the garment as usual according to the care instructions.
How to Remove Colour Stain From Clothes
No matter how bad it sounds, the dye transfer disaster is not the end of the world. By following this step-by-step guide on removing color stains from clothes, you can get rid of those unsightly color stains for good!
Step 1: To remove dye transfer, fill the sink with hot water and add the liquid to make a soaking solution. Leave the cloth to soak in the solution for 1 hour.
Step 2: Dosage Add powdered or liquid detergent to your washing machine, depending on the directions on your pack.
Step 3: Load the laundry, without rinsing out the detergent, place the clothes in the washer along with other similar items. Get information about, laundry starch.
Soaking laundry liquid on the fabric will give your wash an extra boost of cleaning power. Use palm movements to determine if your weight is the right size.
Step 4: Wash the clothing on the Normal cycle, at the hot water temperature indicated on the clothing care label.
Step 5: Unload When the wash cycle is complete, unload clothing immediately, or within 2 hours for optimum freshness.
If dye transfer stains remain after washing, re-treat the garment using liquid detergent, this time allowing it to soak for 20 minutes.
Then, wash again in warm water before drying, preferably in partial shade.
Different fabrics require slightly different steps to undo the effects of dye transfer. Whether you are interested in learning how to remove color stains from a white silk shirt or chiffon dress, you can find all the answers below:
Silk: When it comes to removing a color stain from a silk item, pour 3-4 drops of liquid detergent directly onto the stain and use your fingers to gently rub the detergent into the fabric.
After letting it sit for 30 minutes, hand-wash the garment, then dry it in partial shade. If the stain is still visible, repeat the process before letting the garment dry.
White cotton and chiffon: Soak your white cotton and chiffon garments in a solution of chlorine bleach and water for 30 minutes, then wash with detergent, as usual, to get rid of color stains. Dry in natural sunlight.
Colored cotton and chiffon: You can remove color stains from your colored cotton and chiffon clothes by pouring 3-4 drops of liquid detergent directly onto the stain and working it gently into the fabric with your fingers. Get information about, Do laundry detergent expires?
After letting it sit for 15 minutes, rinse the stained area under cool water, then wash the garment as usual at the hottest water temperature recommended by the care label.
Remember, always wash your darks and lights separately.
Polyester and Nylon: The best way to remove color stains from your polyester and nylon clothes is to put a color catcher in the drum of your washer along with your laundry.
Color catchers are available at most supermarkets and work to absorb dyes that bleed during the wash cycle. Know about, laundry in freezing weather.
Add detergent and wash as usual on the hottest water temperature recommended by the care label. Once the cycle is over, take off your washer and dry your clothes in partial shade.
When dealing with only a few spots of dye transfer, you can try soaking the fabric in a solution of water and oxygen bleach. Get information about, mix laundry detergent with bleach.
First, dissolve some oxygen bleach in hot water, then cool the mixture with cool water. Allow the garment to soak in the solution for about 30 minutes, then wash thoroughly.
If the stain persists, fill your sink with lukewarm water, add two tablespoons of chlorine bleach, and let the fabric soak for 30 minutes before running it through the wash cycle. Also read about, can you mix laundry detergents?
What to Do If the Whole Load of Laundry Fades/Discoloured
If you’re dealing with a new load of laundry that’s completely discolored, simply remove the culprit, and another one on the hottest water setting recommended on the care label, using a detergent that washes the affected clothing.
Run through the wash. How to Avoid Dye Transfer Stains Do you know what’s better than knowing how to remove dye transfer stains from clothing?
Avoid it completely! Here are some tips on how to prevent dye transfer stains from getting all over your clothes:
Sort your clothes properly.
An important rule of thumb when it comes to preventing dye transfer between your clothes is to choose between your darker colors (grays, blacks, navys, reds, and dark purples) and lighter fabrics (pinks, lavenders, light blues, light greens, and yellow).
In separate loads, washing light and dark-colored clothes together increase the risk of dye transfer.
For a more in-depth look at the topic, check out our guide to doing your laundry.
Check hidden objects.
Before putting your clothes in the washing machine, be sure to check all pockets, pant legs and sleeves for colored items such as mittens, scarves, Post-Its, hats and socks.
Check if your washing machine is empty. Get information about, laundry detergent on a plane.
Check the washing machine for clothing items hidden inside the drum before adding another load, and after each wash make sure you’ve removed each piece of garment from the drum.
Dye transfer can easily happen to anyone, but at least now you know how to remove color stains from white and colored fabrics in just a few steps, using excellent stain removal results from the first wash.
Final Words
Thanks for reading our article. Know more about, the Best time to do laundry.